Capturing tools
The thoughts & points capturing tools in MyBible are:
- Comments in bookmarks. Once created, a bookmark is applicable to any Bible module (provided that the module contains the Bible book the bookmark was placed on). There is a powerful bookmarks side panel.
- Remarks. They are attached to concrete words (by a word number in a verse) of a concrete verse in a concrete Bible module, – so they are applicable only to a Bible module they were created in.
- Notes.
Bookmarks
A collection of bookmarks, which are just pointers to Bible verses, without comments in them, is already a potent tool to group findings together for a convenient access & search in them using the bookmarks side panel. An example of such an extensive collection of bookmarks without comments is a bundle module “Holy Words of God .com – Every verse on 32 essential subjects”.
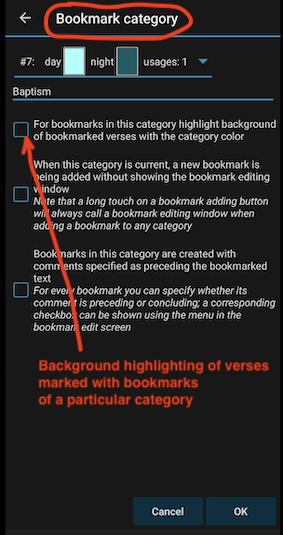
Another way bookmarks without comments can serve you is verses background highlighting that is applicable to any module (unlike individual words highlighting, that is applicable only to a Bible module it was made in). Highlighting of bookmarked verses’s background is specified on the level of a bookmarks category:
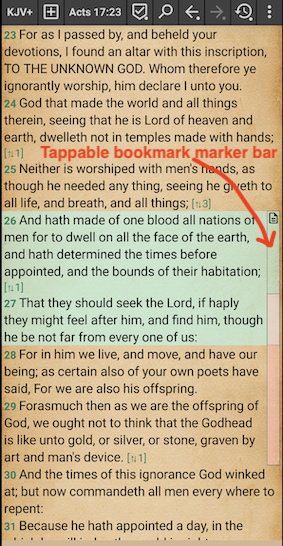
Such a background highlighting is shown when “bookmarks: marker bar” and “bookmarks: background” are checked in the “Show” sub-menu:
Tapping of the bookmark marker bar brings up the “Bookmarks covering verse” dialog:
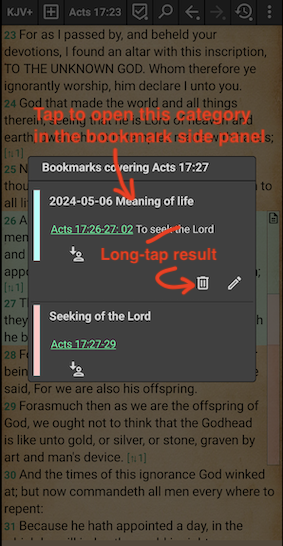
The bookmark marker bar also has a long-tap reaction, – it provides a faster access to the bookmark editing and deletion buttons.
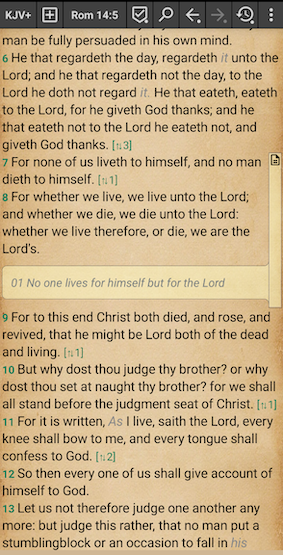
Showing of bookmark comments in the Bible text serves as a great reminder of your previously captured thoughts and points during your normal daily reading of the BIble. It is shown when “bookmarks: comments” is checked in the “Show” sub-menu and looks like this:
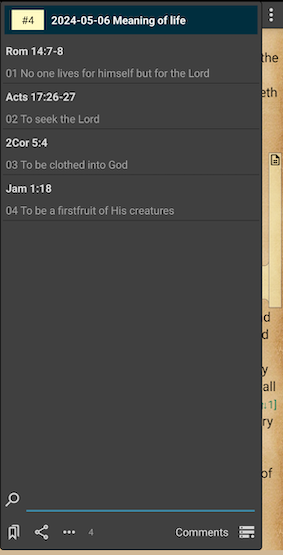
Here is how the bookmark side panel looks when it shows both your comments and the referenced Bible verses:
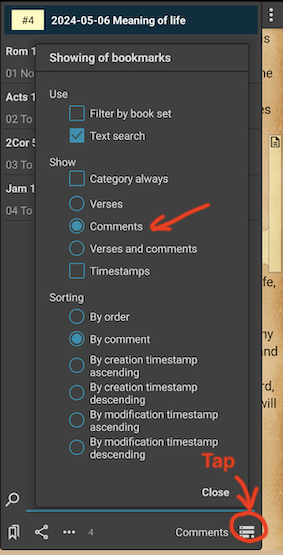
Here are the bookmark side panel settings:
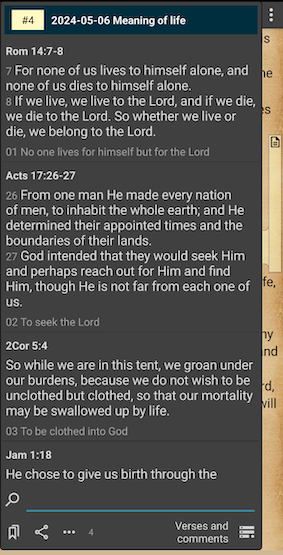
And here is how the side panel looks when it shows bookmark comments only:
Notice also that there is a text fragments search possibility for the bookmarks and separately for bookmark categories (which helps to find a needed category when you have a lot of them).
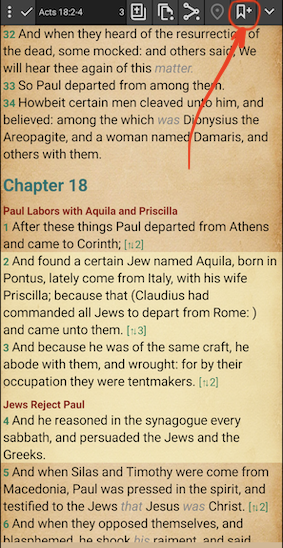
To add a bookmark you need to select a continuous range of verses to bookmark first (bookmarks in MyBible by design cover only adjacent verses). If you have selected several verses that are not adjacent, or if you have selected some words in verses that are not adjacent, creation of a bookmark will assume the entire continuous range from the first verse affected by your selection to the last one. Here is what you tap to add a bookmark:
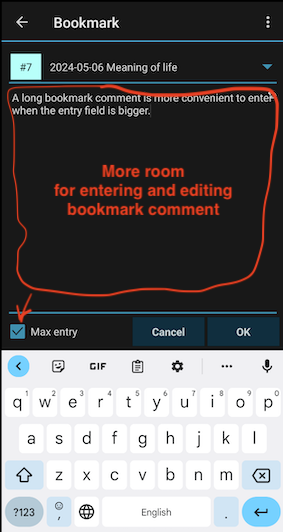
The bookmark adding/editing window has a feature helping you when you want to enter a lot of text as a bookmark comment:
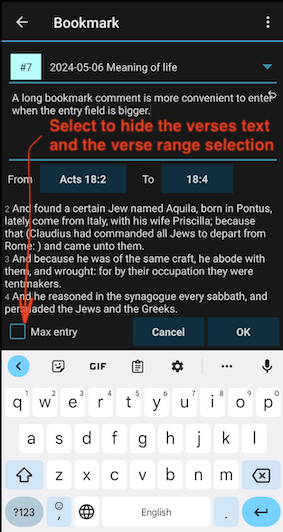
The bookmark adding/editing window will then look like this:
Remarks
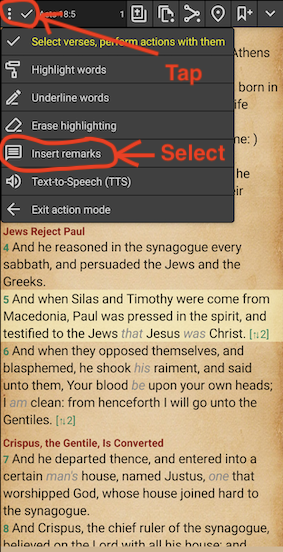
Entering of remarks is done in an alternative action mode – not the one you typically enter upon selection of a Bible verse. Here is how to open the available action modes and select the remarks mode:
However, if you insert remarks rather often, as well as select verses and do some actions with them, notice handling of the different types of a long tap on the Bible text.
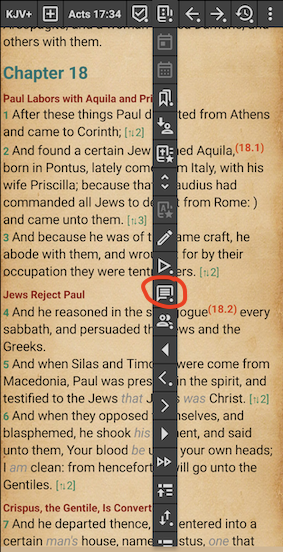
Here is how a remark insertion looks like; in essence, having entered the remarks mode you just tap a word you want to attach your remark to:
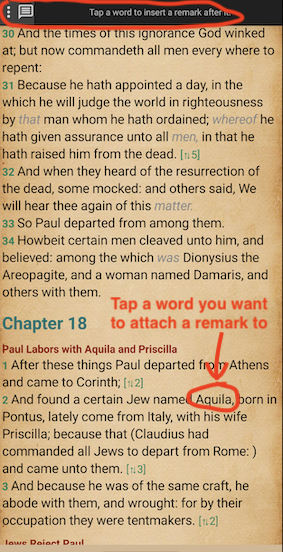
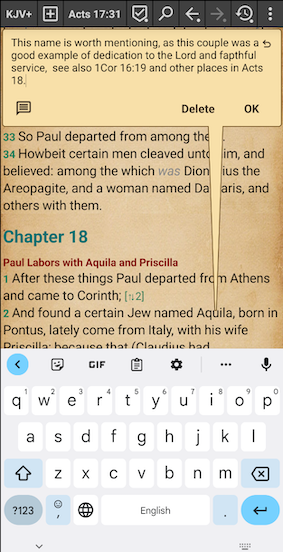
And then in the appeared remark ballon you type in your remark, possibly with Bible references in it:
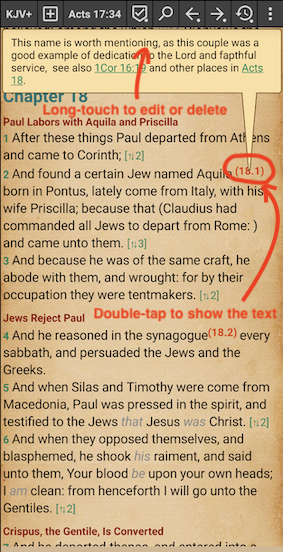
Note that when you edit a remark, you can re-point it to another word in the Bible text – just long-tap a desired word in this mode.
MyBible automatically assigns remark markers by combining a chapter number with a remark order number within the chapter; these markers are not fixed and will change if you, say, insert another remark between your two already existing remarks.
In order to show a remark, double-tap its marker in the Bible text:
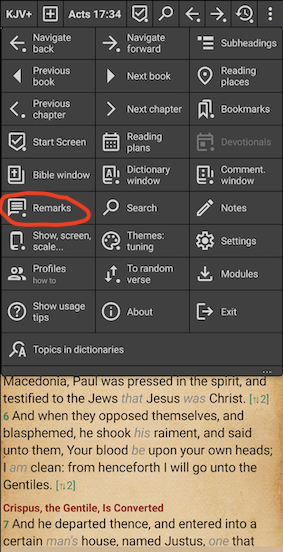
You can review your remarks and search in them using the “Remarks” window, accessible from the main menu:
Notice the dot on the menu item: a long-tap on this item opens remarks only for the current Bible book.
The Remarks window can also be called using a Bible window header button:
Here is how the Remarks window looks like:
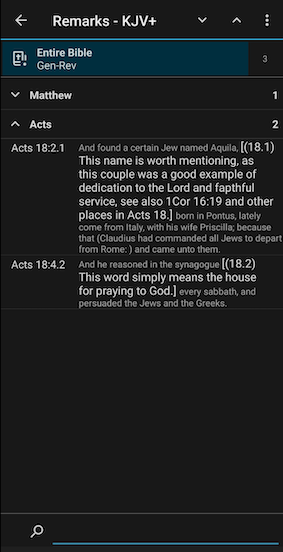
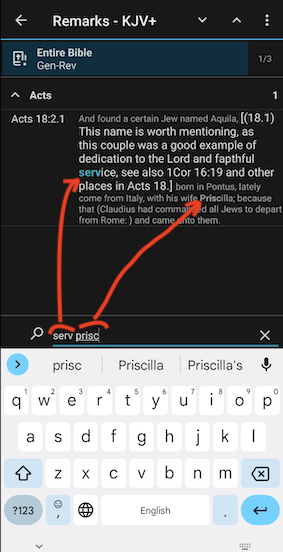
Remarks in the current Bible book are automatically expanded. For each remark you see the remark itself and, in a smaller font size, the text of a verse where the remark is inserted. For searching in remarks, there is a filter by the book selection, and there is a filter/search by words fragments. Entered word fragments are being searched in your remarks and in a surrounding Bible verse:
Notes
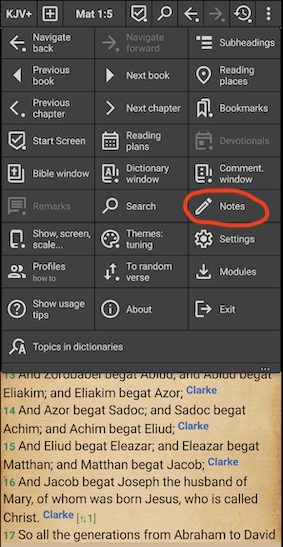
There is the Notes window on the main screen, accessible via the corresponding main menu item:
It is also, and perhaps more conveniently, accessible using a corresponding Bible window header button:
There are the followng features about the Notes window:
- turning of the “Allow editing” mode protects your notes from accidental changes
- it supports basic HTML formatting
- it has the undo and redo functions
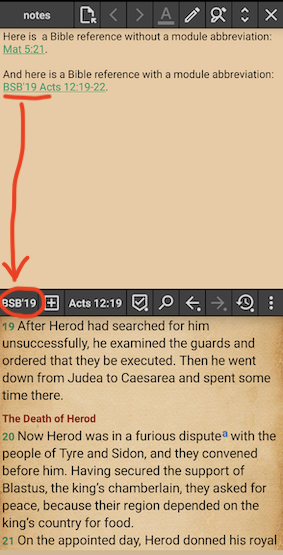
- it supports auto-hyperlinks to Bible places: once the “Allow editing” mode of the Notes window is turned off, all the Bible place references become hyperlinks that open the corresponding place in the first Bible window (see more info below regarding employing of the first Bible window here)
You can add a quote of Bible verse(s) or their fragments to your notes by:
- Using the “Copy selected verses” selection mode header button:
- so that you can paste the copies verse(s) into an arbitrary place of your notes
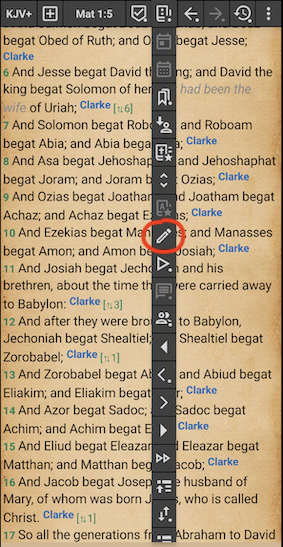
- Using the “Add selected verse(s) to notes” selection mode header button that adds selected verses at the end of your notes text:
- via a space by a simple button touch
- via an empty line by a long button touch
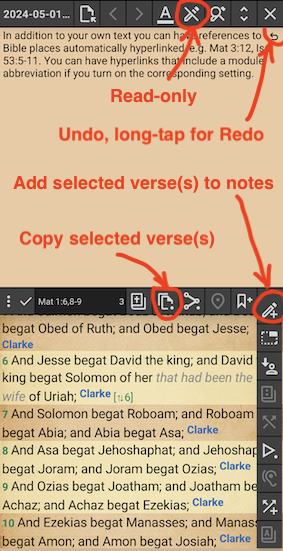
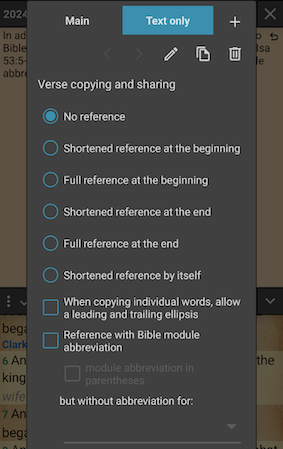
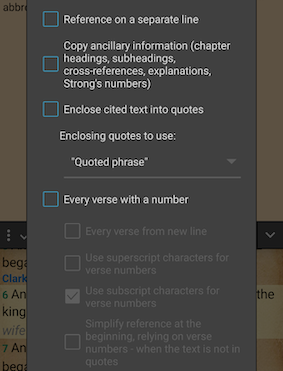
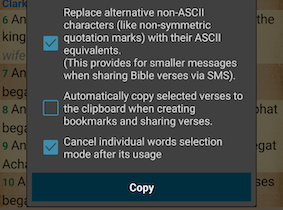
Note the abundance and flexibility of verses copying/sharing settings available upon a long-tap on the “Copy” and “Share” buttons:
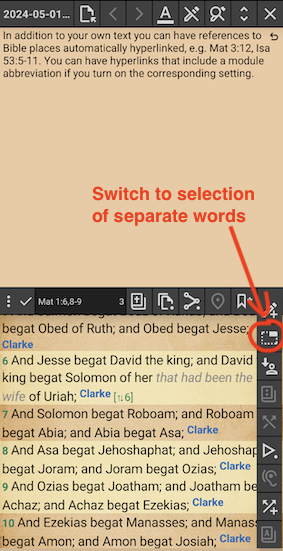
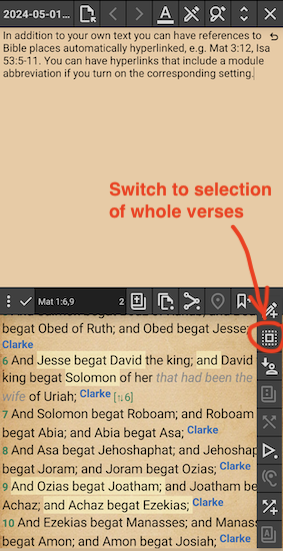
Here is how you switch between selection of entire verses and selection of separate words.
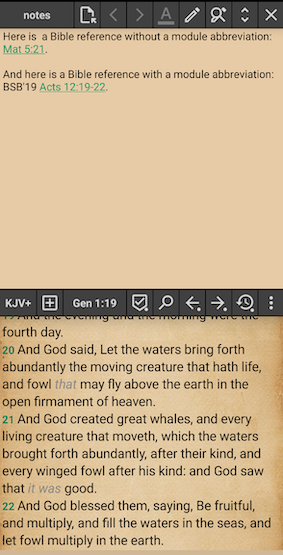
Here is how Bible references automatically turn into hyperlinks when the “Allow editing” mode of the Notes window is turned off:
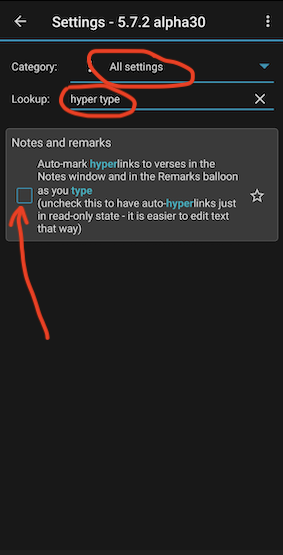
There is a possibility of turning Bible references to hyperlinks as you type, i.e. in the notes editing mode. This has a drawback of an unfixable app crash, should you accidentally make a dragging move on a hyperlink. But if you are a careful typer and remember about this problem, here is the setting:
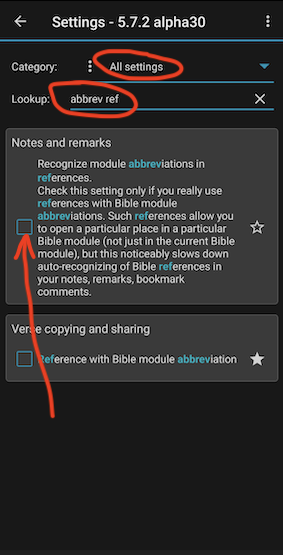
Here is a how to find a setting that includes Bible module abbreviations into hyperlinks (this setting is turned off by default because notes with a lange number of Bible references in them open noticeably slower if this setting is on):
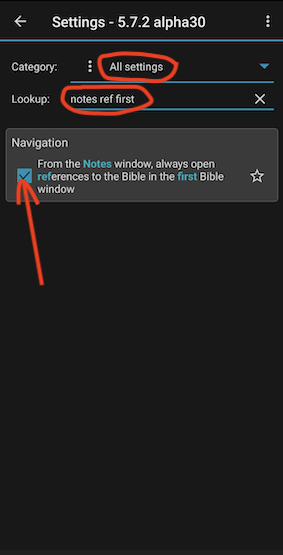
When you have more than one Bible window open while you are working with notes, be aware of the following setting, turned on by default, which overwrites your assignment of the “Bible references target” window:
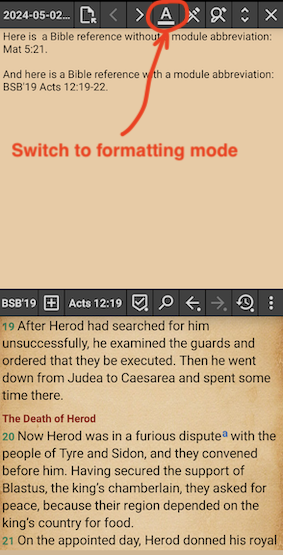
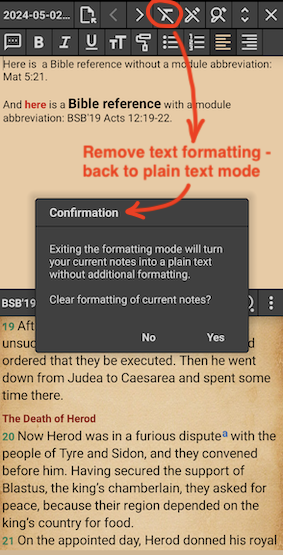
A few words about using the basic HTML formatting in notes. The notes window is either in the plain text mode or in the formatting mode – correspondingly, the file storing the notes has either the .txt or the .html file name suffix. The switch between these modes is blocked when the “Allow editing” mode is turned off.
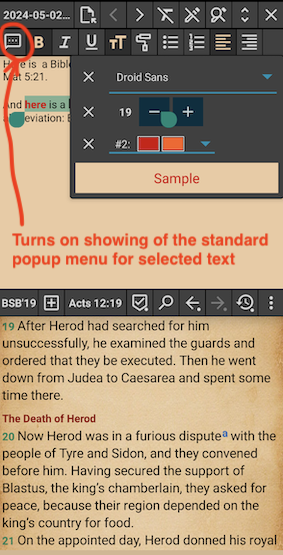
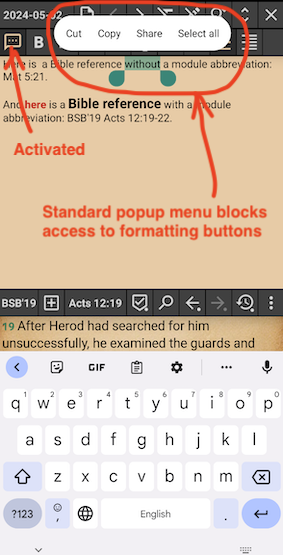
The standard popup menu interferes with the text formatting tools, that is why it is turned off by default and there is a button to turn it on when it is needed (e.g. to copy/share some fragment); here is how the same situation as above looks with the standard popup menu enabled.
And one more “exotic” but sometimes very helpful button: